Kristen Eggleston
  • Demo Reel

C++ Plugins

3/6/2013

 
Picture
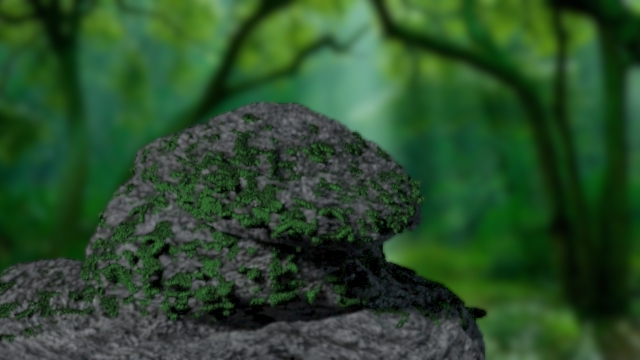
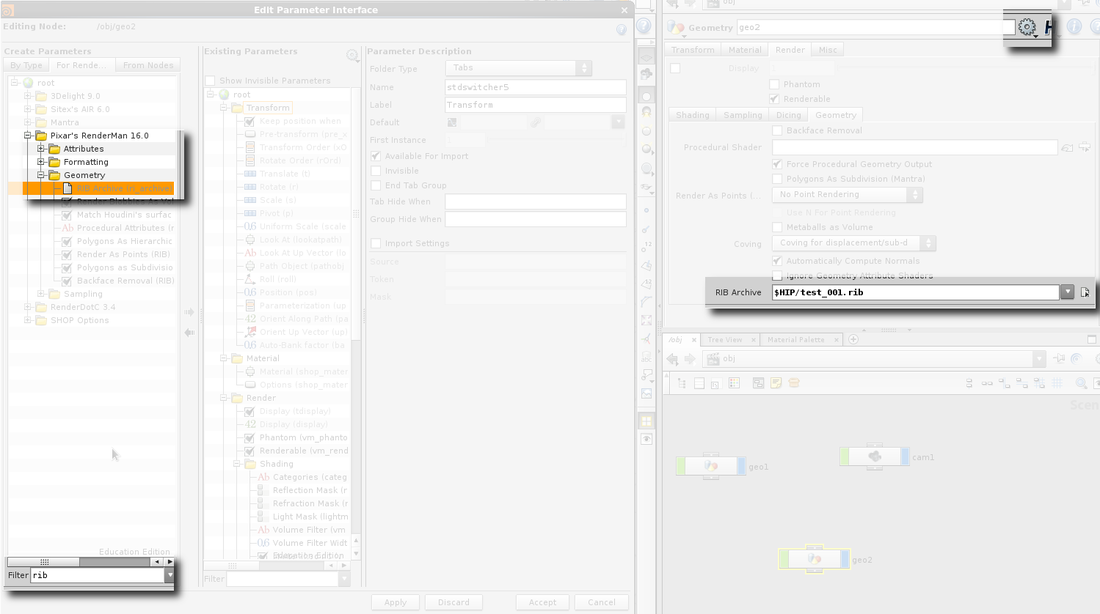
While it can do many things, RSL is limited by the language. To enhance its functionality, one can implement a plugin using Pixar's RSLPlugin C++ API. For a sub-set of micropolygons my plugin writes RiCurves into an archive rib file that is referenced by a later beauty pass render. There are, therefore, two passes. The first creates moss-like geometry via my C++ plugin and must only be done once, the second generates the final image. For information on how to implement an archive rib, look here.


Picture
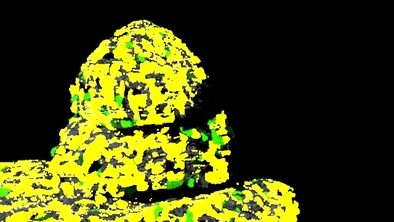
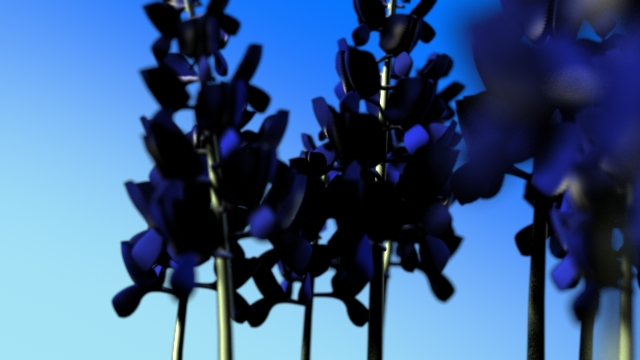
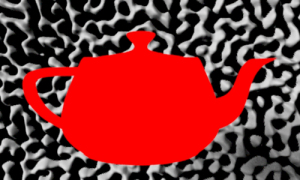
I tried to bake in the lighting into the rib file. Unfortunately this gave extraordinary values like color(126, 100, 50).

Picture
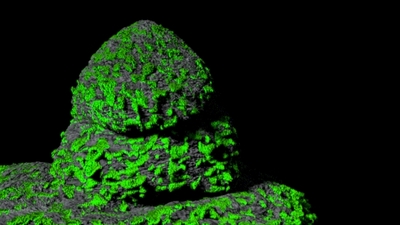
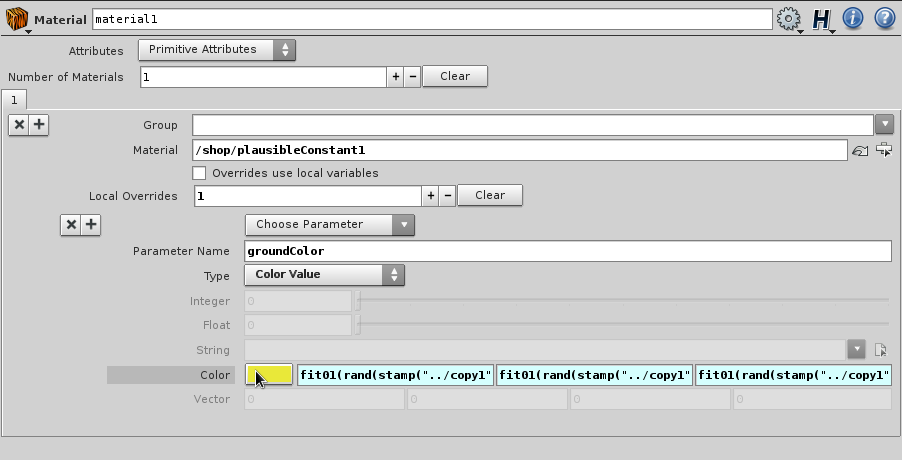
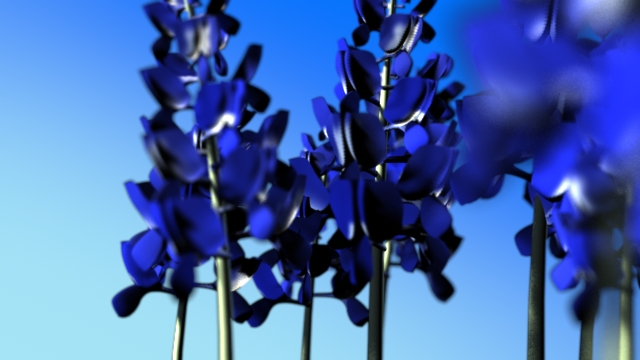
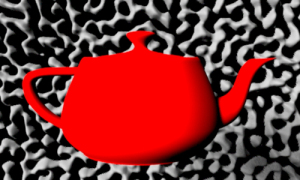
Applying a shader to the curves fixed the problem of trying to pre bake the colors into the moss. This way the plugin generated random variations of the user inputed color and then the shader on the geo container that is reading in the rib archive (how to do that here) takes care of the lighting.

mossgen.sl
File Size: 1 kb
File Type: sl
Download File

mossgenplug.cpp
File Size: 6 kb
File Type: cpp
Download File

perlin.h
File Size: 3 kb
File Type: h
Download File

Reading in a RIB File

2/27/2013

 
  1. Make a new geo container
  2. Click on the gear to go into edit rendering parameter interface
  3. Filter the options by "rib"
  4. Add RIB Archive under Pixar's Renderman
  5. On your geo node, enter the file name into the newly added RIB Archive field
Picture

One Shader, Many Looks

2/20/2013

 
Picture
With Renderman in Maya, one is able to change a texture map or an attribute based on the name of the object it is applied to. In Houdini, this is done on the material node by adding local overrides. The user can alter any attribute on the chosen shader based on a group or on a stamped copy number.

Be careful when changing texture maps. These are passed in a strings rather than floats or integers so proper formatting is key:

          `"/path/to/file/filename" + number + ".tex"`

Now the user can alter the number so that filename1.tex, filename2.tex, and filename3.tex are all accessible by the same shader and material node leading to quicker render times!
Picture

Translucency Shader (RSL2)

2/15/2013

0 Comments

 
Picture
Bluebonnets with translucency
Picture
Bluebonnets without translucency
Reference photos
This is really a fake translucency shader meant to be applied to a single sided surface.

The real challenge is forcing the directlighting() function to use the reversed normals. In the old style of coding, one could just say:

       Ci = Os * Cs * (diffuse(nf) + diffuse(-nf) * surfcolor); 
Meaning that the final color (Ci) is the apparent opacity, apparent color,  and the diffuse of the front face added to the diffuse of the back face multiplied by the surface color.

At first I was switching the normals within the directlighting() function and something just wasn't working with the diffuselighting() call to get Ci. After playing, the reverse of the normal was put in the displacement() function, the normal place to initialize normals to the shader, with the following lines of code. The normals were changed as well as the shading context, that holds the information for the material and object, were also inverted.
         N *=  -1;         m_shadingCtx -> m_Ns *= -1; 
Then came the brute force way of getting the lighting information. After gathering a list of lights, the light color and direction was returned from a modified plausible light shader. The modifications to the basic plausible light shader were to force it to return the color and direction of the light. This worked, but did not show shadows.

Eventually I went back to trying the default method of lighting (directlighting()) to try and figure out the path between the material and the light to generate samples for shadows. I did not figure out the path because calling directlighting() returned shadows and translucent light information!
    float doReverse = 0;

    displacement(point P, point N)
    {
        if (doReverse) {
            reverse normals;
        }
        else
            normal normal initialization;
    }
    surface ( color Ci, Oi )
    {
        frontColor = directlighting();

        doReverse = 1;
        this -> displacement;

        backColor = directlighting();

        Ci = backColor + frontColor;
    }
Translucency Shader
File Size: 2 kb
File Type: sl
Download File

0 Comments

Frosted Glass Shader

2/15/2013

 
The frosted glass shader was my first attempt at writing a shader that other artists could use. It was written using the RSL2 extensions to the RenderMan Shading Language. Implementing a class based shader makes it surprisingly easy for the shaders (internal) instance variables to be shared by the methods that are called within the shading pipeline.
Picture
Frosted glass reference
User Controls: color, frost color, spec color, spec and reflective gain and roughness, internal reflections, index of reflection, displacement amount, and specific frost controls.  The frost is based off of a noise pattern, with user controls, the amount of frost and at what space the frost is coming from.

By entering the name of a null (Houdini) node into the shader, the user can move the frost around. The animation above shows frost “growing” on the teapot. This was done by animating the radius of influence of the null node which is explained more here.

The ramp that is the change from glass to frost is also controllable  and the influence does not have to be smooth, it can change from a straight edge to a noisy one.

For additional functionality I plan on allowing the user to input an image of their own frost. The frost is currently based on wavelet noise, controlled by user input, but it is still not completely under the user’s control.

There is also a test to see if the color was greater than 1, at which point the surface color was defaulted to white. It would probably be a better idea to have three separate if statements checking each rgb value and setting them individually because that would be somewhat awkward to have a white pixel where it should be red since the green and blue values were also changed.

Frosted Glass Shader
File Size: 18 kb
File Type: sl
Download File

Introduction to Class Based Shaders

2/15/2013

 
Renderman has a way of programing shaders in RSL, by using classes. This allows a displacement shader to be in the same file as the surfacing function and for physically based shaders.

I've been exploring these new shaders within Houdini, because Houdini is more fun than Maya. I found that I had trouble writing my shaders correctly because I did not understand how the renderer, the material and the light were working together to make the surface color.


Plausible Constant
Picture
The constant shader is just one constant color across the surface. It never has to access the light and therefore has just one constant color.


Plausible Diffuse
Picture
The plausible diffuse shader adds shading to the surface. It is like a lambert shader in that there is no specular or reflective quality.

The material’s surface() function can be substituted with the diffuselighting() function without too much of a difference. The difference in the rendering can be seen here.

The material’s diffuselighting() function asks the light to generate samples for the diffuse color and the shadow and those are saved as the Ci and outputed by the material.


Plausible Specularity
Picture
The plausible reflective shader is essentially like a blinn in that you may control the specular highlights and reflectivity of the object. The reflectivity is referred to as “indirect specular”.

The diffuselighting() and specularlighting() functions work by layering their Ci returns on top of each other: diffuse, reflection then specular.

The material actually gathers the sampling information in that order, diffuse, indirect specular and direct specular. This was essential to know in order to separate out the controls for a softer reflection versus specular.

How to Render a Rib File from Houdini

2/15/2013

 
Click the checkbox that says "disk file" on your ROP.
Picture

Setting Up Houdini to Render with Renderman!

2/15/2013

 
As with most things in Houdini, this is a simple check box.

Go to Edit -> Preferences -> Rendering  and check the "Pixar's Renderman" check box.
Picture
This opens up all the shaders and settings for Renderman. If you are newer to Houdini and/or Renderman, I suggest unchecking "Mantra" so that you don't get confused.

To convert .slo shader files to something Houdini can read, use either Cutter (downloadable at www.fundza.com) and set up your paths and preferences or use the terminal and convert the .slo file using the prepackaged script.

Type into the terminal window after navigating to where your shader is:


slo2otl.py -l myshader.otl myshader.slo

Then you will install the digital asset library into your hip file by going to File -> Install Digital Asset Library and all of your shaders will be accessible through the shop.
Picture

One Way to set up Lights in Houdini

2/15/2013

 
Create a normal light in the network view by hitting the tab key and typing "light".

Make sure you have created your light shader in the Shop network, mine is called "plausibleSunlight1".

Add your shader to the light material and control all light attributes except for position within the shader.

Picture

Changing Coordinate Space Based on a Null Object

2/15/2013

 
This is for Houdini. It turns out that you can very easily map a shader attribute to a null object's position in reference to a point on the object. You could use this for making frost grow on an object.

Pass in the object's name as a string, "/obj/null1".

Measure the distance from the point to the origin of the null.


         // Makes a point in object space, not
// passed in as (0,0,0) because it is
// automatically converted to object space
point fs = point "object" (0,0,0);

// Transforms the point to null space
fs = transform("/obj/null1", fs);

// Calculates the distance from point to point
float d = distance(fs,transform("shader", P));
Make a ramp based on that distance to change whatever attribute.
        influence = smoothstep(0 + rampSize, radOfInfluence, d);
If you are having difficulties getting the null or whatever object you are using to be recognized by the shader, check the name you are passing in. The easiest way to do this with a null is to check the only default checkbox in the render tab which allows the null to be written to a rib file. Then force the ROP to create a disk file and search the disk file for that string name.

Also note that when entering the name into the field in the shader, double quotes are unnecessary and will break your render. Just enter the name of the object: /obj/null1
<<Previous

    Categories

    All
    Accidents
    Cool Tricks
    Houdini
    Shaders

    Archives

    March 2013
    February 2013

    RSS Feed

Proudly powered by Weebly