Kristen Eggleston
  • Demo Reel
  • Contact
  • SESI
  • Explorations in Renderman
  • Mechanical Spiders

Mood Board 2.0

7/19/2013

0 Comments

 
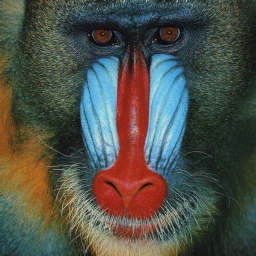
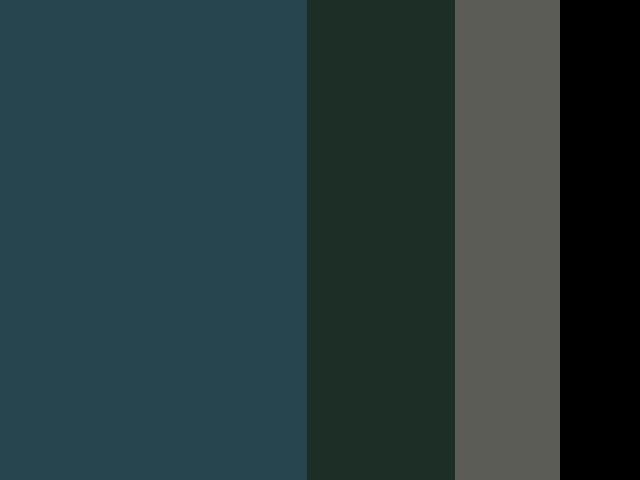
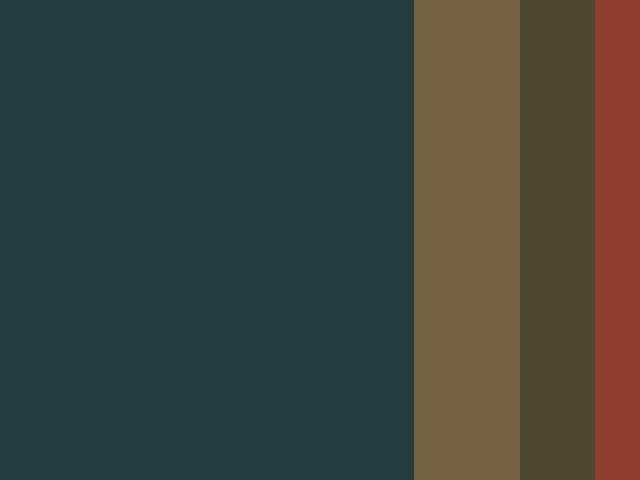
New pieces have been added to the algorithm! Based on above math!
  • Based off of HSV rather than RGB
  • Averages colors that are similar together rather than taking first one
  • Average colors give higher weight to more saturated and higher value pixels
  • Combines like panels together so that there aren't 5 close green stripes together; user can iterate how many times this happens/if it happens

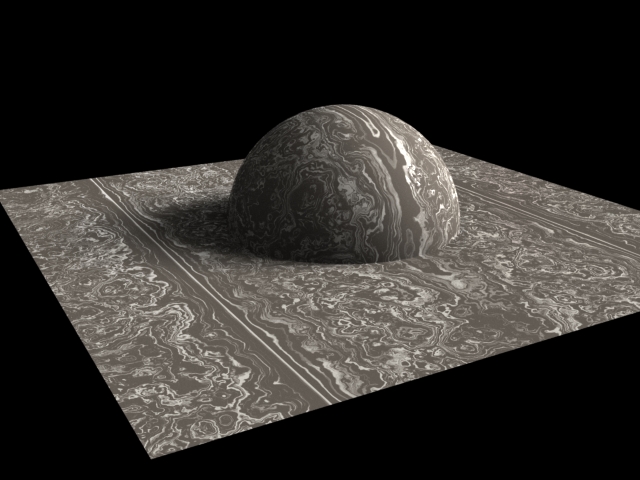
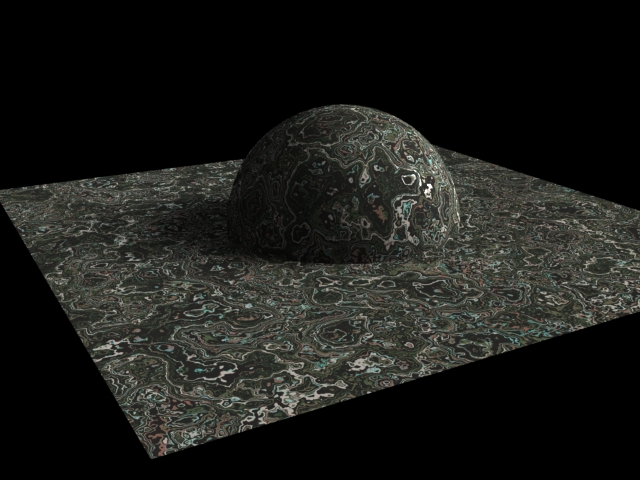
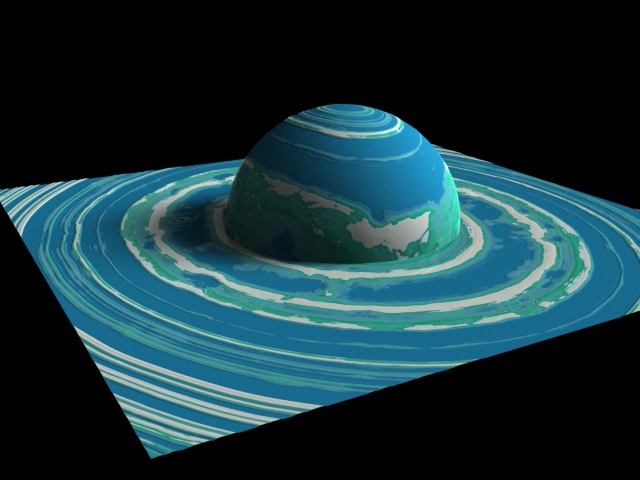
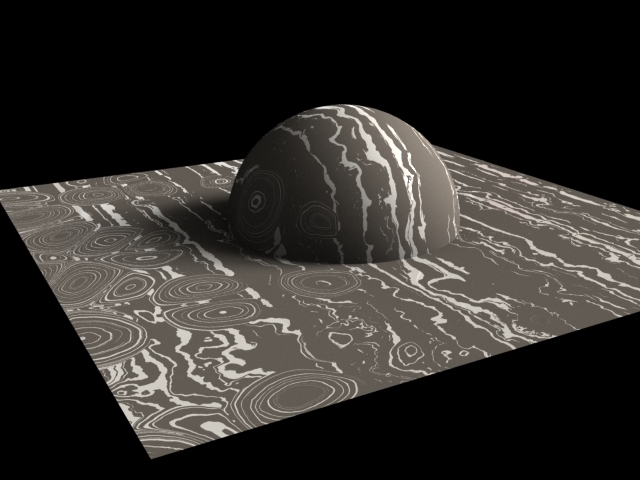
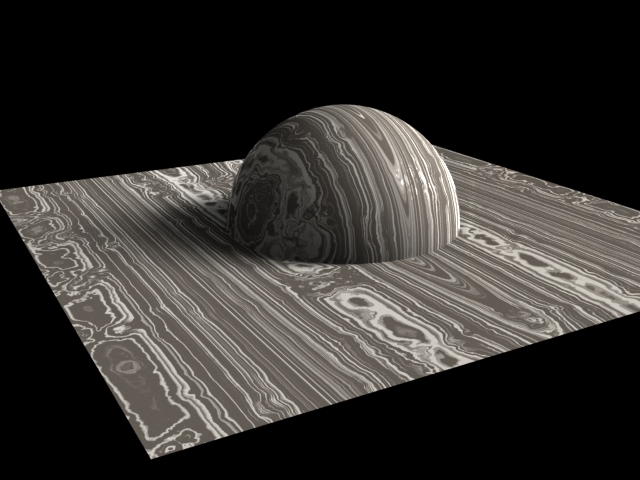
This has given rise to above two images. The left was generated from the blurry monkey image, the right from the sharp one. Surprisingly, the sharp image gave more saturated colors which I suppose makes sense considering that a blurred image generally tones down the colors due to the blurring.
0 Comments

Making a Mood Board

7/17/2013

0 Comments

 
If the user has a reference image they like, they would want to use the colors out of it. This python node in COPs takes the image and generates a ramp node with the proportional values of the most prevalent colors.

Blurred and sharp images return different results, I like the blurred one better because it forces the computer to ignore (in this instance) the fur information and focus on the over all color. I'd also like to add preference based on the luminance of the image because to me, the bright blue and red and orange of the image are more important than the dark colors. This is not accurate to the photo but I feel that users choose reference photos based on composition of the colors rather than seeing the straight relevancy of them, otherwise they wouldn't need to use a chooser like this to pick their colors.

User Inputs:
  • Number of colors (to be included on ramp)
  • Leeway (color variance)
Want List:
  • Stand alone python node that can be put in shader network rather than COPs network
  • Blur input
  • File input
  • Changes shader inputs based on top color(s)

0 Comments

Layered Displacement

7/15/2013

0 Comments

 
Trying to add new features to the shader, I've stumbled across the necessity for multiple displacements. It turns out that this is completely possible to layer one displacement on top of another one, meaning that instead of just adding various values together, you can just pipe everything together in separate displacement nodes for finer detail. The key is to add a the re-dicing parameter to the mantra node. Read more here.
Picture
Adding re-dicing parameter to ROP
This does add time onto renders but really not that much for how cool the outcome is.
0 Comments

Force Toggles to Cook

7/9/2013

0 Comments

 
Due to my unwillingness to sit around for hours waiting for my renders to be finished and hitting a different checkbox each time, I stumbled upon a new script:
hou.cd("/wherever/your/node/is")
hou.pwd().cook( force = True, frame_range = (startFrame,endFrame,1))
When placed on the matra ROP on the pre-frame script, this forces the material to re-cook each frame, allowing the checkboxes to be re-evaluated and the correct pretty picture to be outputted.
0 Comments

Rendering Time!

7/9/2013

0 Comments

 
Today will be spent making high res renders of what the shader can do. I will be going through all the options, making sure they all still work, and setting up default options if necessary.

Problems:
  • This shader is so big, it takes forever to render just a straight color. It must be calculating everything at the same time and I don't know how to turn that off.
  • Difficulty with making checkboxes animate when not direct parameters

Solutions:
  • I think rendering was taking an hour+ not only because the maximum rays were too high but the samples on the occlusion layer were exorbitant as well. Reducing samples to 16 produces only slight graniness and is not really visible unless you are all the way zoomed in. Below are tests done with default render settings and 1.5 shading quality. The rest of the layers render in no time at all.
0 Comments

Wood 2.0

7/9/2013

0 Comments

 
Scratches have somewhat been achieved! They're based off the same cracks that I made previously in a cellular noise fashion. The user has the ability to control the size of the cells, the patch frequency that they are being put into, the edge of the cells and somewhat the planks the cracks are being put on.
0 Comments

Wood

7/8/2013

0 Comments

 
If you would like to learn a bit about the above woods, take a look here.

Houdini has a node that does wooden planks (hooray!), so I'm currently working on modifying that so that the various planks are more random like real wooden planks are. I've put in presets for the various colors to reflect the above woods, just to give the user a starting point. I know that defaults help me figure out how the shader was built and what I am meant to do with it.

Picture
Now there are variations within each plank! But the wood grain is very uniform. In the reference photos there are large swatches of variations within the color then sharp lines of darker color on top of that. Now to figure out how to do that!


Picture
Blurry/sharp combination acquired! It does make it a little darker overall but I've put in controls so the user can control the levels separately. The mesquite wood has high levels of this blurry mess underneath the darker sharp lines. It also has cracks in the wood which I am going to simulate next.

0 Comments

Dust

7/5/2013

0 Comments

 
I probably could've taken my own reference photos for this but I'd rather not document my dust.

Important aspects of dust:
  • Actually small layered particulates meaning many variations of displacement and color
  • Must have a transparency master control for ease of user
  • Seems to change the saturation of the base color rather than adding any color on
  • Dulls specular almost completely

Basic dust formations have been acquired!! I like the left handed image better, it has the saturation component taken down where the dust is to create the illusion of a fine layer of dust over the surface rather than just the flakes of dust created by the displacement. The dust does not seem to need many variations or parameters since it's just a particulate layer on top of an object.
0 Comments

Look at all the pretty swirls!

7/3/2013

0 Comments

 
0 Comments

Damascus 2.0

7/3/2013

0 Comments

 
Picture
I want to be able to combine the lower two options of concentric circles and the striations to make more of a traditional Damascus pattern. So far, layering has happened rather than forming the stripes around the circles. Time to play with math (using different methods of combining the noise functions) to see if that will fix all my problems.


Picture
Success!! Now to figure out which parameters to promote and where to clamp the values. This happened by piping in a ripple sop in between the multiplication of the UVs and the rotated matrix so that there was already that rippled effect before the striations from the noise happened.

I think this looks much more like real Damascus than the previous renders. It also kinda looks like wood, but there is a node for that so I do not think I will use this as a base for making a wood texture, but rather I will use that node.

0 Comments
<<Previous
Forward>>

    Author

    Compilations and contemplations of my time as a Side Effects intern.

    Archives

    August 2013
    July 2013
    June 2013

    Categories

    All
    Discoveries
    Fun Renders
    It Totally Works
    New Feature
    Personal
    Problems
    Uber Shader

Proudly powered by Weebly